
What is a compostable toilet?
Just take a couple of minutes to read the first article I wrote on the subject if you want more details.
If you already know about it, or if you’re in a hurry, you can skip this part and go directly to installation.
Compostable toilet?
A compostable toilet is one that is waterless. Instead, a composting product allows the transformation of solids into compost.
How does a compostable toilet work?
It works a little like a conventional one, gathering solids into a tank. Instead of water, the composting product, with adequate ventilation, facilitates the composting process, without any odor.
Why is the Air Head model more suitable for my boat?
For starters, it’s the least expensive among those I analysed, It also has a bowl which is adapted to the boat hull, handles for transportation and maintenance (emptying of the bowl). With the Air Head, only the bowl is moved, whereas the whole toilet needs to be transported for maintenance on the other models. I must admit, it’s great!
4 easy steps to install a compostable toilet on a sailboat.
Of course, you can replace your current toilet. You’ll have to dismantle it, take it out of the boat, remove the ‘’black water’’ tank, gaining space doing so and, why not, remove the through-hull and plug the holes.
Next, you’ll have to set up the place where you’ll install the toilet, prepare it with all the components and ventilation needed.
It took me a whole weekend to accomplish all this, from very early in the morning to very late at night.
The steps
Removing the old one
Preparing the base where the toilet will be set
Preparing the toilet (installing the components and ventilation)
Setting the toilet on its base and finishing installation
Step 1 – First removing the old toilet
Dismanteling the toilet is relatively easy. I also had an installation with a macerator that I sold later on (I also sold my toilet and bowl, by doing so reducing the cost for a compostable toilet.) The pipes were a little more complicated to remove because there were a lot of them. It was fairly easy, though, when I decided to cut it all in small parts (which was very useful for tight spaces). I strongly suggest wearing rubber gloves.
Finally, removing the two through-hulls was easy. I used a buffer to cut through the clamps. They were quite used anyway, I knew I couldn’t recuperate them. Of course, two pretty holes remained, one for sewer, usually big, and the other one for water intake. To fill them up was the longest operation.
First and foremost, I sanded all around the holes, approximately 5 times the width of the holes on the VIKINGR’s exterior, and as well as I could in the interior, up until I saw very clearly the fiberglass. I finished cleaning it all with acetone.
Secondly, I filled the holes with G-Flex. I placed some masking tape (the green one, for paint) inside the boat, I prepared the G-Flex mixture which I applied directly on the tape from the outside (the sticky part of the tape). I carefully covered the holes, making sure they were totally filled, letting some of the mixture spill out. I then let it dry thoroughly.
Step 2 – Preparing the base on which the toilet will be set
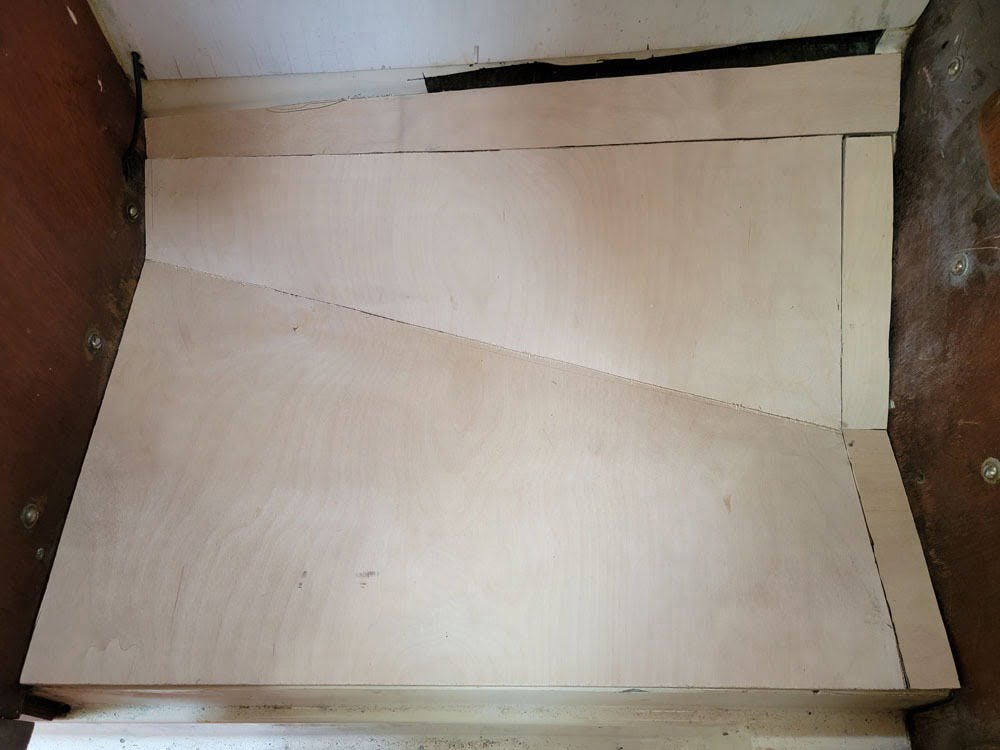
While the G-Flex was drying, I took the opportunity to prepare the base to receive the beast! I cut out, in a 3/8 thick russian plywood, a board to make my base and also to hide part of my hull and part of the «inner» that I cut to make myself a little more space. I then temporarily placed the toilet on the base to do some tests to see where I would definitively set the toilet. I prepared everything for the next day, without anchoring anything at that time
Step 3–Installing the compostable toilet’s components
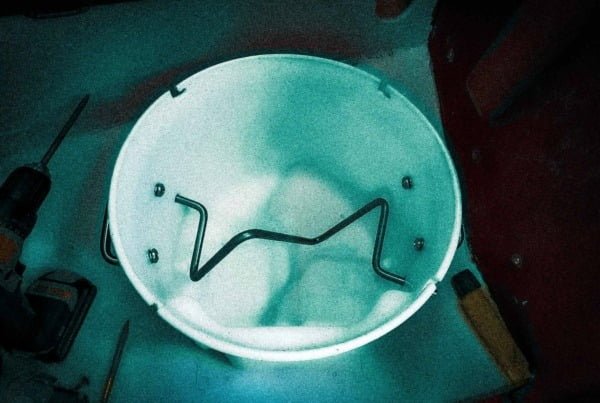
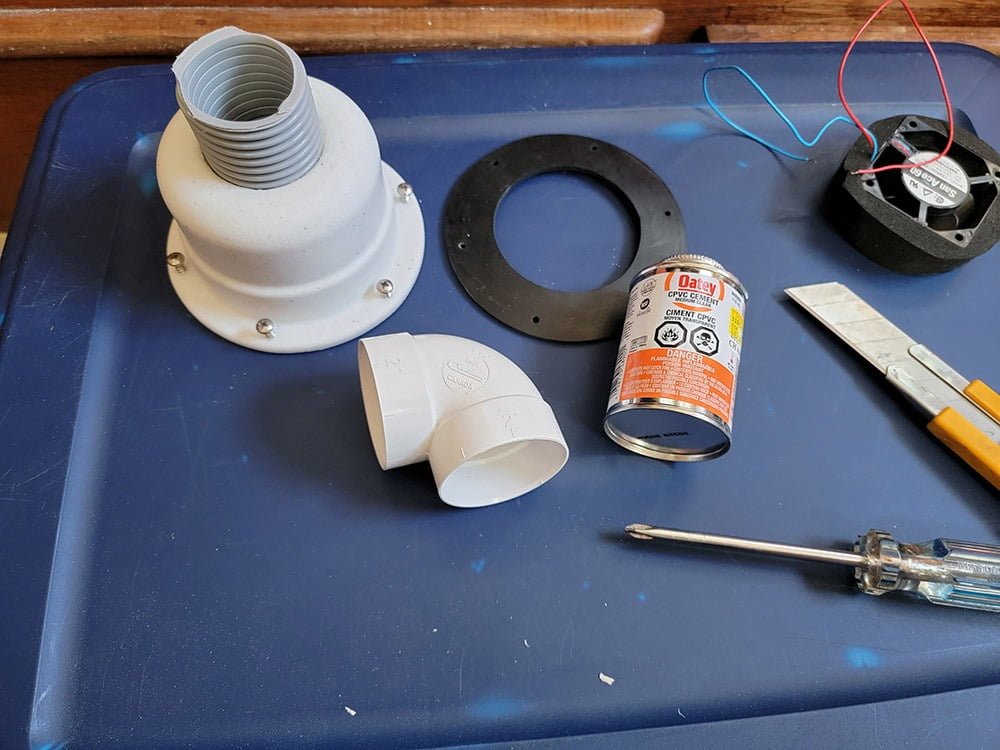
I installed the components, i.e. the first part of piping for ventilation (the pipe comes in two separate parts, which is very convenient for the bowl’s transportation) as it is very well explained in the installation manual and video.
Basically, you have to glue a soft collar that allows the hose to rotate on itself and place a rubber washer on the other side, without forgetting to install the small screen, ensuring adequate sealing of the system and good air circulation.
Installing ventilation (pipe and fan)
I decided to use the ventilation system I already had inside my bathroom (if one can call it that on an Alberg 30!) I could have used the small vent tube installed on the black water tank, but, since the one in the bathroom was nearer, it’s the one I chose.
I connected the small fan and tested it all! Honestly, I don’t see much difference in energy consumption for the ventilator since it uses 0,06A.
End of first day!
Step 4 – Setting the toilet permanently and finishing installation
The day after, I decided to finalize the hole filling operation. The G-Flex mixture being totally dry, I cut out strips of mat, in the shape of a circle, from the largest to the smallest, 20 strips total. I then had 5 exterior layers of mat and 5 interior ones, for each hole. I set it with epoxy resin. I will finich, next weekend, sanding and preparation of the exterior hull. I don’t fuss about the interior part, the wood base covering it all.
So I permanently set the base with G-Flex and applied epoxy resin on the finition fabric. I let it dry and sanded it to paint it later. I waited a few hours, aerating all the while.
Screwing the toilet onto its base and finishing the installation
It just couldn’t be easier. All it takes is putting the toilet on its base with the provided anchors and draw directly on the base using a lead pencil to pinpoint the locations where they should be. This allows for a quite precise adjustment and gives a good idea of how the toilet will be placed.
The anchors are then removed, placed directly on the marks we just made on the base to drill the screw holes.
Now all that remains is setting the anchors on the base with screws in the good size, put the toilet on them and screw it in!
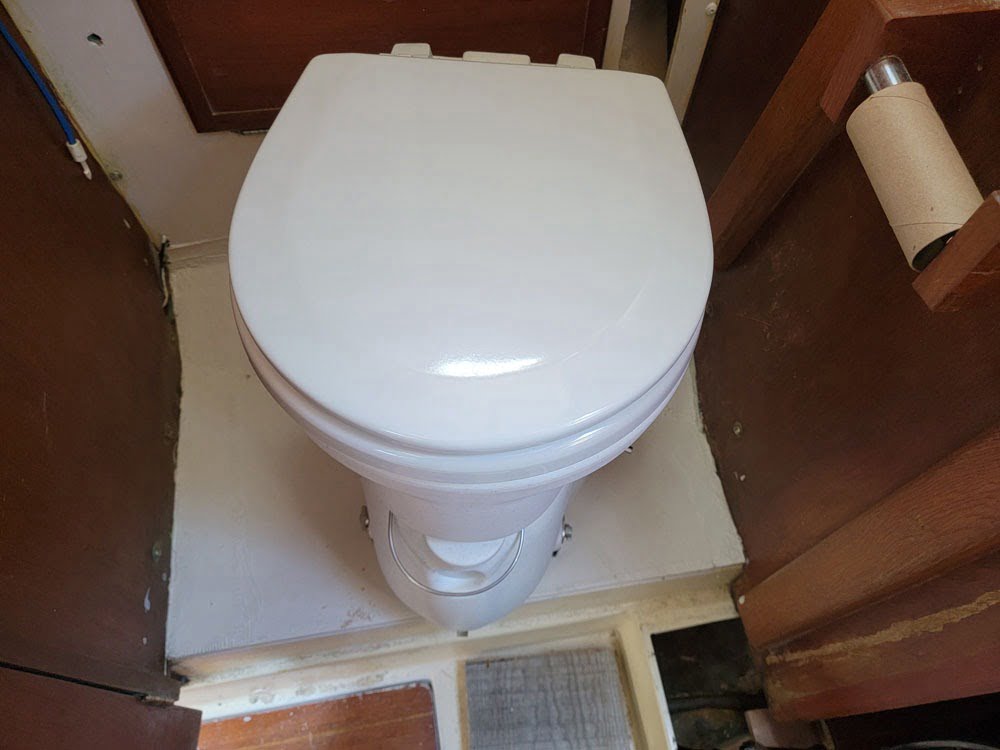
There! The toilet is well set in it’s place!
See the video of the Air Head.
Preparing the compostable toilet for its first utilization
The choice of a composting product
It is very important to use solely organic products, without any chemicals, to ensure compost realization. So, never use chemical products for composting, nor for cleaning the bowl, like chlorine, for example. Anyway, it would be useless, there is no odor. I will explain later how to use it correctly and how to clean it.
For my compostable Air Head toilet, I only use organic peat moss that is found in any good gardening products store.
Filling of the bowl
To fill the bowl which will serve as receptacle for the solids, add peat up to the stirrer line (or crankshaft) or a little less. Then add water, enough, but not too much!
The perfect mix
I ran some tests for myself. You can make your mix more or less damp, depending on you wishing to throw your used toilet paper in the compost or not. If that’s the case, your mix will need to be damper than not to allow composting. With that said, after 3 months of usage and a very damp mix, the paper may never have completely decomposed. This is normal, so don’t worry…
Daily utilization
Just to add on the toilet paper topic, you must use compostable paper. Since I never had the intention of putting my toilet paper in a plastic bag or plastic trash can alongside my Air Head, I did some research on that also. You can therefore use unbleached paper without any problem, the kind made especially for RVs, for example. I bought mine at a store selling RV equipment.
Honestly, I don’t recommend putting your used toilet paper in a plastic bag or plastic trash can that you would have put alongside your toilet. First, a sailboat heels… there is this risk that you’d have to pick this all up at some point. Besides, I changed my conventional toilet for a compostable one specifically to avoid the odors, if you know what I mean…
Peeing
If you’re a man, just go outside. Be careful and buckle yourself up if it’s windy or things get rough. You can also urinate in a bottle that you’ll empty later or even next morning.
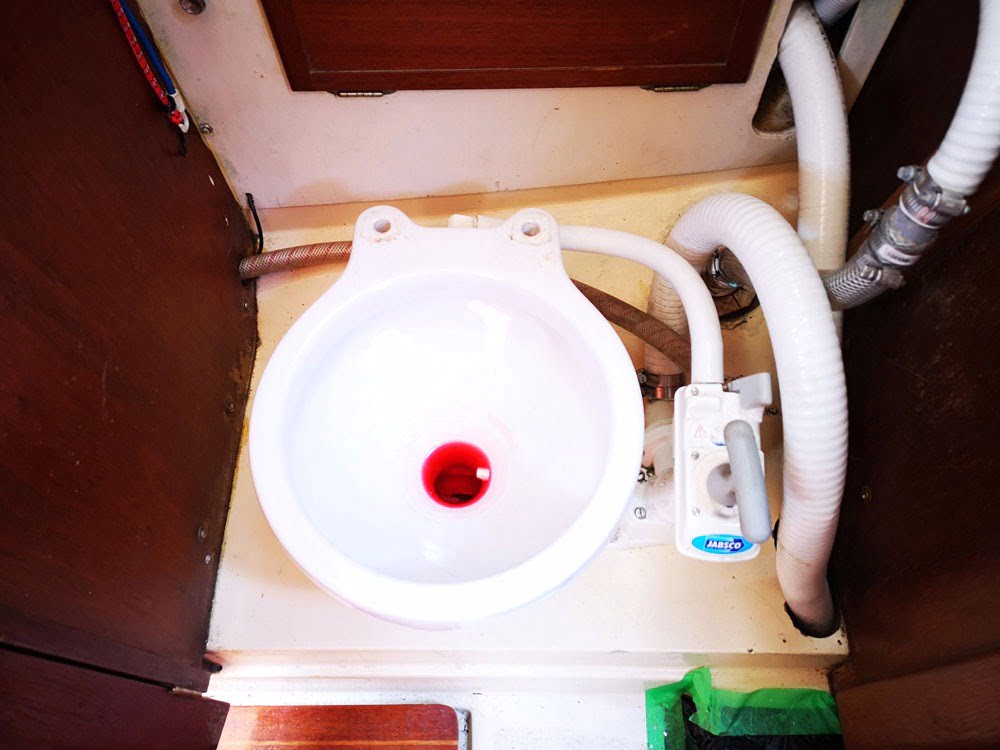
If you’re a woman, you can use the toilet. There is a small hatch that must be closed, and the liquids are brought directly into the urine container placed in front of the Air Head toilet.
A number 2?
This is how I use my Air Head for that. I close the small hatch and put a coffee filter (spread completely, unbleached, and compostable) at the bottom of the high part of the toilet. This eliminates the need to clean it at each utilization and it works real fine! However, don’t urinate at the same time.This is where it gets a little complicated, at least the first times.
Indeed, you have to learn not to do both at the same time, that is to say urinate and do a number 2. In clear terms, you have to become a pro of sphincter management. I tell you in all humility, it’s easier said than done. Personally, I always pee before doing my number two. It helps me a lot.
You must, at all costs, avoid mixing solids and liquids. Composting will be greatly compromised, and odors will fast be… perceptible!
To close the topic of number 2
So, I do my little business and then use toilet paper just like at home (you’ll quickly become pro of moderate usage of toilet paper). When I’m finished, I get up and push the handle to open the hatch. The little package disappears in the bowl. I close the hatch (of course, if you’re curious, you can leave it open, but don’t forget to close it before closing the lid. I turn the handle a quarter turn, sometimes a half turn. I close the lid (I check if the hatch is closed, all the same!).
And that’s all!
The project in images


FAQ
How to know if the toilet is full?
Easy, you will find it difficult to turn the handle. The compost will be very visible as soon as you’ll open the hatch. It’s time to empty it.
Where to dispose of compost?
You can bring it home and leave it 3 months in a place designated for composting. Indeed, it takes 3 more months in composting mode to complete the process.
This compost should never be used for all things related to human consumption, but you can fatten your shrubs and flowers without problems (provided you don’t eat them!).
You can also throw it all overboard (not the toilet, but compost!) 5 miles away from the shore*.
* This information remains to be verified
Where to buy a Air Head?
In Canada, directly on the Air Head site : https://airheadtoilet.com/
How to clean my compostable toilet correctly?
I, for one, use a pressure machine to thoroughly clean my toilet. I also take it outside for winter. Splashing good, clear water in it gives it a renewed look. I then store it inside, in a closet. And no, there is no odor there either. 😀
How much time before it gets full?
In daily use, for a couple, it’s about 2 months, maybe a little less. Myself, always going solo, I got to use it for more than 3 months last year.
When my sailing season was over, I brought it home (not the whole toilet, just the bowl), to empty and clean it. It was really due for that. To make transportation easier, I bought the lid which is sold apart but is really handy.

Voilà! Hope you enjoyed this article ?!
If so, feel free to share it. It helps me with Google SEO and it doesn’t cost you anything.
Also, you can subscribe to my private list, by entering your email address and your first name, at the bottom of this page. That way, you’ll be notified when I publish a new article!
And finally, your opinion / comment is welcome!